Hello, Guy do you want to transfer hosting from Godaddy to Bluehost? Then you can do it in a very easy way.
Recently I moved from GoDaddy to Bluehost it was very easy. Here I want to clear I just transfer hosting from GoDaddy to Bluehost, not domain.
If you search move hosting from Godaddy to Bluehost you will get many more data but
To migrate from GoDaddy to Bluehost you just need to follow some easy steps.
How to migrate from GoDaddy to Bluehost
Here I will provide you step by step guide on “How to transfer hosting from Godaddy to Bluehost”.
When I wanted to migrate my hosting I did research the web information and I found most of the content was incomplete or outdated.
And the fact is these domains & hosting providers keep updating their self according to time.
As a result, the website looks totally different in 2022 from a couple of years ago.
What,s I’m aiming for here:
how to transfer hosting from Godaddy to Bluehost in a very easy manner
I will provide step by step guide on how to change hosting from GoDaddy to Bluehost although it’s optional. it depends on your willingness which hosting provider you want to choose.
transfer website from GoDaddy to Bluehost:
Now I suppose you have decided you want to change hosting from GoDaddy to Bluehost
Note: Bluehost has given me a special discount for my readers. You can now get hosted for Just 2.95$/month
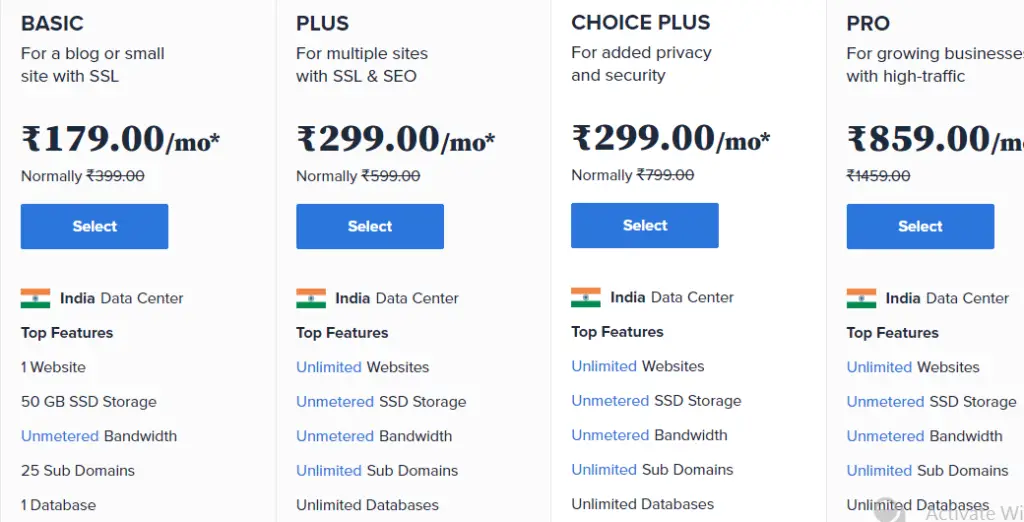
However, if you are an Indian user you can get it for Rs 179/month.
I know how it is important for you. you want quick and painless migration. Keeping all these things in mind I am going to provide you written as well as a visual guide.
Here I want to clarify with you all I am not going to use any plugin. I will explain the manual process.
Note: Migration of WordPress website or custom blog website hosting process are the same.
Step 1:
Sign Up and purchase a hosting plan:
The first step is to SIGN UP with Bluehost. You can search hosting plans as guests and can enquire about domain availability. But to purchase a hosting plan & domain you will have to sign up.
Once you signed up and your account id is created you can log in again with your user id and password.
Now you can purchase hosting by selecting a hosting plan with an active Bluehost account.
If you have only one blog you can go with a basic plan if you want to create multiple blogs you can select the Plush hosting plan
Blue host shared hosting plan price for US-based hosting plan
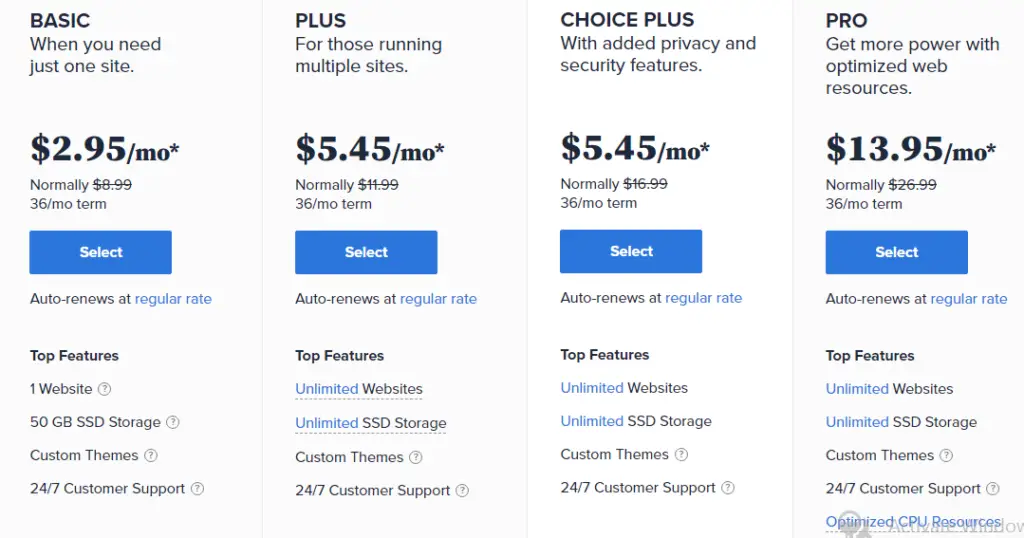
This is a US-based server hosting plan. If you want to target US-based traffic, a US-based server is good for you.
Now follow the steps to register:
Go to the website just by clicking on the Start Tab
Select the plan. Basic is a popular one selected by most the blogger
On the next page, you will be asked to submit a domain name. Submit the domain name you are using with GoDaddy hosting.
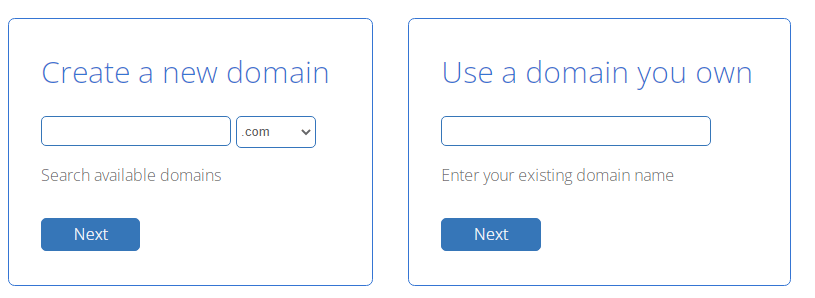
Create a new tab for new users.
I am simplifying migration it means you are an existing user and you have a domain name.
Fill in the domain name in the second box and click on the next tab.
The new page is to submit your detail and payment information.
Once payment is done you will get all the detail on the Email you have entered. along with this, you can see the detail by log-in in with the user id and password to the Bluehost account.
Now your hosting plan is active.
Why use Bluehost as your web hosting provider:
All the information I am providing is based on personal experience
1 – Best price in the Industry: Bluehost offers a reasonable price I like its pricing according to plan.
2- Bluehost offers a 1-year free domain.
3- Provide the best speed in the industry
4- Good security option
5- 24/7 Customer support
Step 2:
Download your blog website files:
Log in to your GoDaddy account select the Webhosting tab and click on the manage option you will be redirected to the Cpanel page (control panel page).
If you have created a user id and password for Cpanel you can log in directly to Cpanel.
Once you entered into Cpanel Click on the File Manager tab under the file section.
A new page will appear on the left side find out the Publick_html folder and click on it. You will get all the files under Public_html select all the files and click compress for download.
Choose Zip archive and hit compress file.
Once the compressing process of the file is done find out the newly created zip file and click on it to download the zip file to your computer.
Process in one line:
Cpanel>File>File Manager>Publick_html>Select all file>Compress>Download.
Step 3:
Export your GoDaddy database:
Once again go to Cpanel enter into the Database section and select phpMyAdmin. On the left-hand side, you will get your website Database.
Expand the website database you will get many more tables on the right side like Comments and posts etc. tables.
Go to the top menu and click EXPORT.
Export method>> Quick and Format>> SQL. Hit the go button
The Database will be saved to your computer.
Process in one line:
Cpanel>database>phpMyAdmin>database>export
Step 4:
Change Domain Nameserver:
To change Domain Nameserver once again you will have to go into your GoDaddy account. Now click on my product tab. It will show you all the products you have with GoDaddy.
Now this time explore the domain tab
Now select the manage DNS section. Once you click on the manage DNS new page will appear.
Go down to the page you will find the Nameserver of your domain.
Now click to change the Nameserver of GoDaddy with Bluehost Nameserver. That you received by email when you register for Bluehost hosting.
Bluehost Nameserver looks like this:-
ns1.bluehost.com
Save the changes. Now your Domain will point to Bluehost hosting & the server
Step 5:
Assign your domain to your Bluehost cPanel:
Now login to your Bluehost account go to the domain section and click the domain manager tab.
Choose assign from the top menu and pick the second option “Use a domain that is not already associated with your account” and type your domain name.
Example: YourDomainName.com
Now go down and select addon vs parked and be sure Addon Domain is selected
Now in the next step select the Addon directory and sub-domain, Select create a new directory.
Example: public_html/yourdomainname. As a sub-domain.
Now click assign this domain.
Step 6:
Transfer website files to Bluehost:
Open your Bluehost account go to hosting select the Advanced tab there you will get a “file manager tab” click that new popup window open asking you to select the directory you wish to open.
Select document root and select your domain name from the drop-down list. Hit submit button.
Now click the upload button from the top menu to upload the zip file you downloaded from GoDaddy pulick_html files.
There will be one hack:
If your zip file is more than 150 MB you will have to upload it via FTP.
Step 7:
Create a new database in Bluehost:
Go back to your Bluehost dashboard find the database section and click MYSQL Databases.
Create a new Database, ie. database1. Click create a database and write down the name of the database (including prefix)
Database example: prefix_database1
Now add a user create a password and write down the user name
Example: prfix_user1
Click the create user tab.
Now add the user to the database you just created.
Step 8:
Move database to Bluehost:
Go back to the database section but this time select phpMyAdmin.
On the left side of the panel find the database you created.
Step 9:
Edit Wp-Config.php file
Go to the Bluehost account and select the advanced tab to get the file manager section. A new popup will open asking you to select the directory you wish to open.
Tick document root and select your domain from the list and click submit.
Select wp-config.php and open it with the code editor
Now find the DB_Name DB_user DB_password now change it with the database name and password.
Step 10:
Save permalinks:
It’s simple
Login to your website as Admin
Go to Setting>> permalinks
simply save. all done
Our aim was how to migrate domain and hosting. in these steps we learn how to migrate hosting now we will learn how to migrate the domain.
Step 11:
Transfer Domain registrar GoDaddy to Bluehost:
First, I want to clear it’s optional you can run successfully your website without changing the registrar
To transfer your domain name you will have to follow the following steps:
1- Login to the GoDaddy account
2- Select the domain and go to the manage section.
3- Turn off the domain lock as it is necessary to transfer.
4- Now go down to get the authorization code tab and click on it it will send you the code via email registered with your GoDaddy account.
You did all the steps needed on GoDaddy.
Now go to your Bluehost account and follow the steps:
1- Get the domain you want to transfer and check the box next to it.
2- Click the transfer option tab
3- Now again click on the transfer this domain to your account link tab
4- Paste the authorization tab you got from GoDaddy via email
Congrats you did all the necessary steps you should take to transfer the domain name. it might take a few days to change the registrar but you don’t need to worry about this.
All the steps will be done behind the scene.
Top searches: Profile creation site list, Article submission site list, Social bookmarking site list, Forum submission site list, guest posting site list, Unique visitors, meta tag, Search engine submission, Do-follow backlink, Google webmaster tool, SEO, Duplicate content, organic traffic, Infographics submission sites, Press release submission sites, Classified submission sites list, Web 2.0 sites list, Image submission sites list, Business listing sites
Read more – MrBeast Net Worth 2023| YouTuber
Most searched keyword – What is a Self-Hosted Blog, Law Firm SEO Services